IB Computer Science Introduction to Java
IB Computer Science Learning Goals
In this IB Computer Science lesson you will be learning about:
- Installing Java
- Using an Integrated Development Environment
Installing Java
In this course you will learn to write computer programs. A computer program must be written in a programming language. I have decided to use the Java Programming Language in this course. Java programs are written in a development environment.
We will be using the Netbeans development environment.
You will need to install the following software on your computer.
STEP #1 – INSTALL THE LATEST VERSION OF THE JAVA DEVELOPMENT KIT
- http://www.oracle.com/technetwork/java/javase/downloads/jdk8-downloads-2133151.html
- Or just Google “Java Development Kit Download”
- Make sure to click to Accept the License Agreement
- Choose the proper installation for your circumstances (Likely Windows x86)
- Choose all the default options when installing
Example Screen that you might see (version might be different but it doesn’t matter)

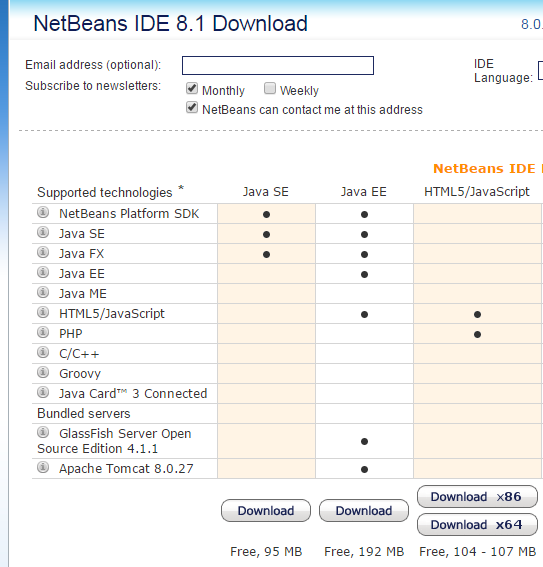
STEP #2 – INSTALL THE LATEST VERSION OF NETBEANS
(ONLY DO THIS AFTER INSTALLING THE JAVA DEVELOPMENT KIT IF YOU WANT TO MAKE YOUR LIFE EASIER)
- https://netbeans.org/downloads/
- Pick whatever installation you wish but the first one is all you need for the course
- Choose all default options when installing
Example Screen of what you might see
Organizing Your Java Programs
You should create a folder on your computer to save all your programs / projects.
- Create 1 project and then create individual .java files for each program I ask you write this year
- Will work well for
- Simple 1 file programs with text output
- Simple 1 file GUI’s that require no external resources (image or text files)
- When submitting work to the dropbox you can simply find the .java file on your computer and just upload that single file. (A GUI will create a .form file as well, feel free to hand that in as well)
- You need to make sure to hand in the .java file NOT the .class file.
- The .java file contains what you wrote, so I need to mark that, the .class file is just the byte code. I don’t need that as I will just recompile and test your code on my computer.
Don’t worry if this sounds complicated, it will make a lot more sense when we start writing some computer programs, and the course material will teach you how to do all of this.
Creating Java Programs with Netbeans
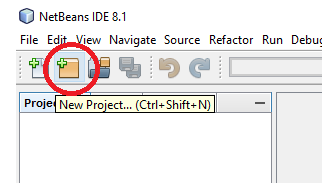
Create a New Project
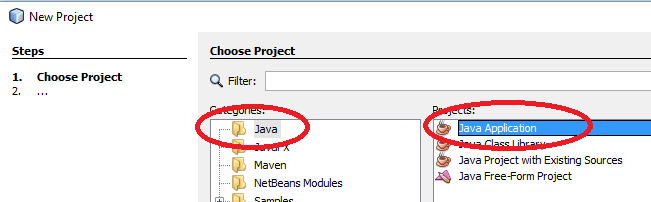
Select Java Application
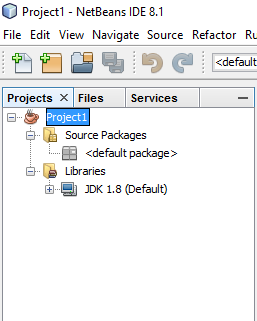
Name Your Project, navigate to the correct file folder where you want everything to be saved, Unclick Create Main Class
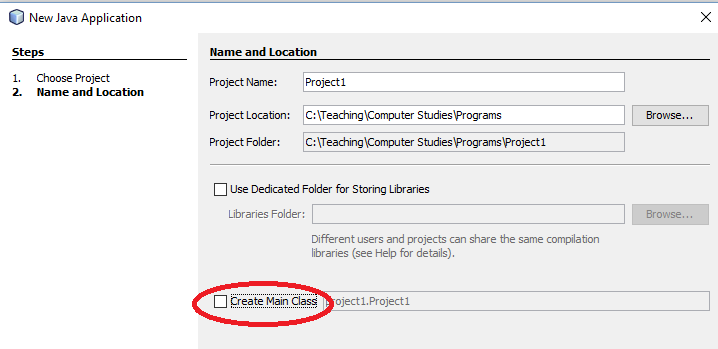
Your Screen Should look something like this
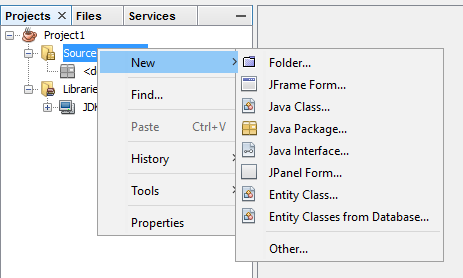
To create java programs, right click on source packages. There are generally two types of files we will be using. A Java Class and a JFrame Form. A JFrame Form will make it easier to write Graphical Interfaces (GUI’s), but most of the time you will just use a regular Java Class
If you choose “Java Class” it will open up a blank program and you can start writing code

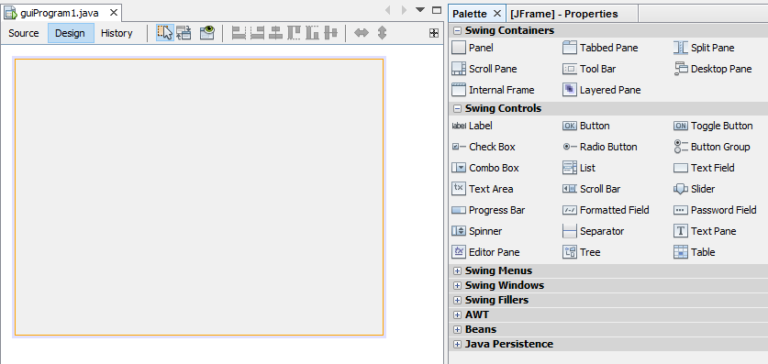
If you choose “JFrame Form” it will open up a blank GUI designer form
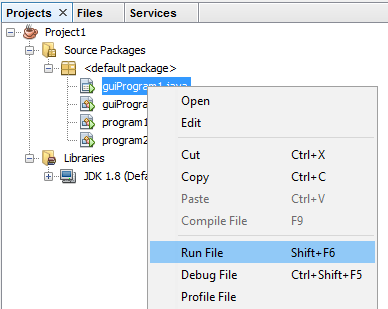
You can create as many java programs as you want all under one project
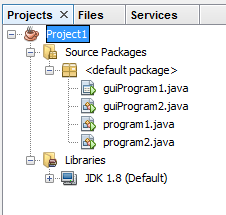
To execute an individual program just right click on the .java file and click run file
Looking to Learn More about Computer Science and Coding?
Check out our programing in python courses that focus on high school level coding.
These courses are complete with interactive coding lessons, teacher led videos, and more practice questions with complete solutions
Return To International Baccalaureate Computer Science Main Page